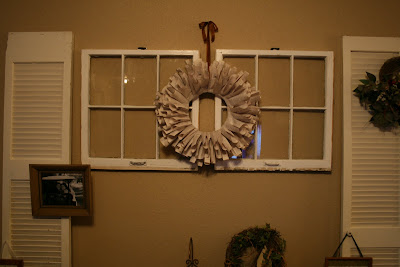
I am so in love with all of the different projects and ideas out there using old books. This wreath took me quite a bit longer than my first one but it was well worth my patience and time in the end!
I'll start out with a picture of the final product. From then I'll post some step by step pictures!

Materials Needed:
1. An old book
2. Squiggle scissors (not sure of the technical name) :)
3. Ink pad (optional)
4. Hot glue gun
5. Wreath form
6. Ribbon
7. Pencil
Step 1. Take your wreath form and cover it with ribbon. Depending on what type of wreath you have, you may not have to do this. But since I had this wooden one, I decided to wrap ribbon around it so it would be easier to hot glue the pieces on. (Notice I ran out of ribbon 3 times) Obviously if it was going to show, it would bother me, but since I knew it would be covered, I had to use what I had lol.


Step 2. Using your curvy scissors, cut out circular shapes from your book pages. I did five pages at a time so it would go by faster. Keep cutting until you have a huge stack! This may take awhile.


Step 3. This one is totally optional! Take your cut out pieces and roll the edges on the ink pad. WARNING: this does make the process quite a bit longer! But I felt like it added an extra and simple worn look to the flowers.


Step 4. Take each piece and glue them one by one onto your wreath. Use your pencil by putting it in the middle and bending to make a sort of flower shape. Then after putting a dot of hot glue on it, use your pencil to help push it down onto the wreath. Do this one by one until finished. The key is to put each flower as close to the next one so that no ribbon shows underneath. Once you're done covering it, go back around and check for any holes that needs to be filled in with another flower. This may require some deep breaths! :) Since I decided to use such a big wreath, it took me awhile to finish. So time may very depending on the size too!


Almost done!!!

A detailed close-up!

And ta da! My monster of a wreath is finally done!

Tip: I only did the front side and the inside of the front of it. Since I will eventually be hanging it on a wall somewhere I knew the back wouldn't matter. Just think how much LONGER it would have taken!

I'm in love!

Have a fabulous day!
-Lindsey


